Integrating Campaign Monitor with Webflow Using Webflow Logic: A Step-by-Step Guide
January 5, 2024
Getting email subscribers is crucial in marketing directly to people who actually care about your product or service! Fortunately, with Webflow's Logic flows it's easier than ever to hook up these services directly into your Webflow website. This guide dives into how to set up Campaign Monitor with Webflow using the dynamic capabilities of Webflow Logic.
Step 1: Setting Up Your Campaign Monitor Account
Before integrating with Webflow, ensure you have a Campaign Monitor account. Sign up and set up your account, creating your email lists and segments as needed. You'll need your API key that you set up in Campaign Monitor and the List ID you want the subscriber to go to.
Step 2: Creating an Email Sign-up Form in Webflow
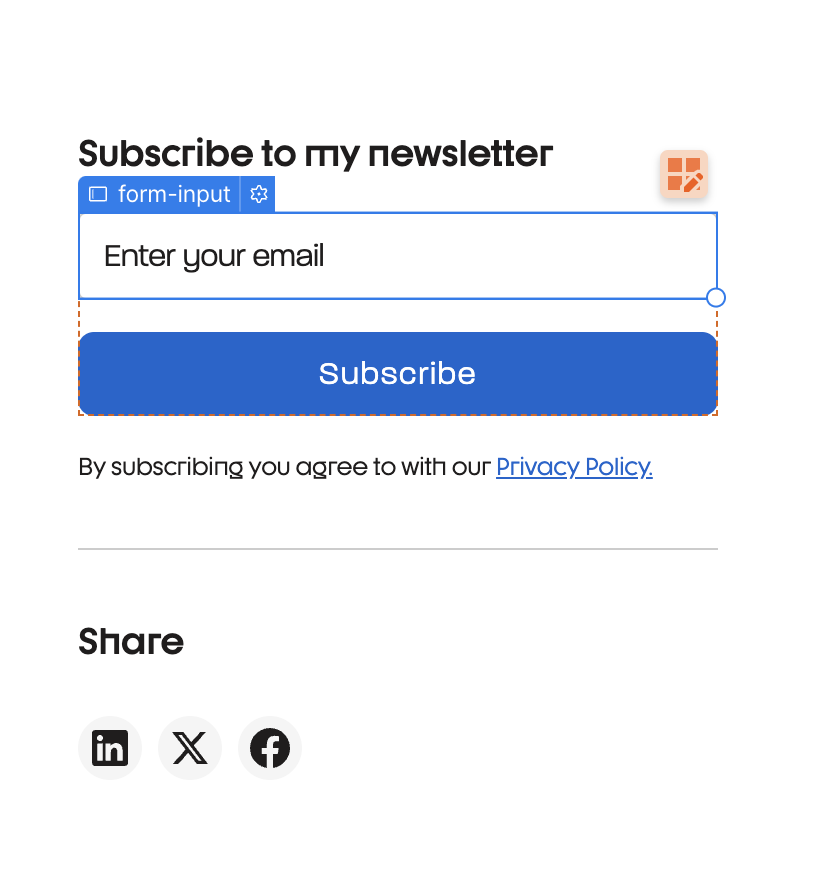
Start by setting up your email subscriber form. In this example I've only required an email address, you can add more details if needed.
Step 3: Setting up Webflow Logic
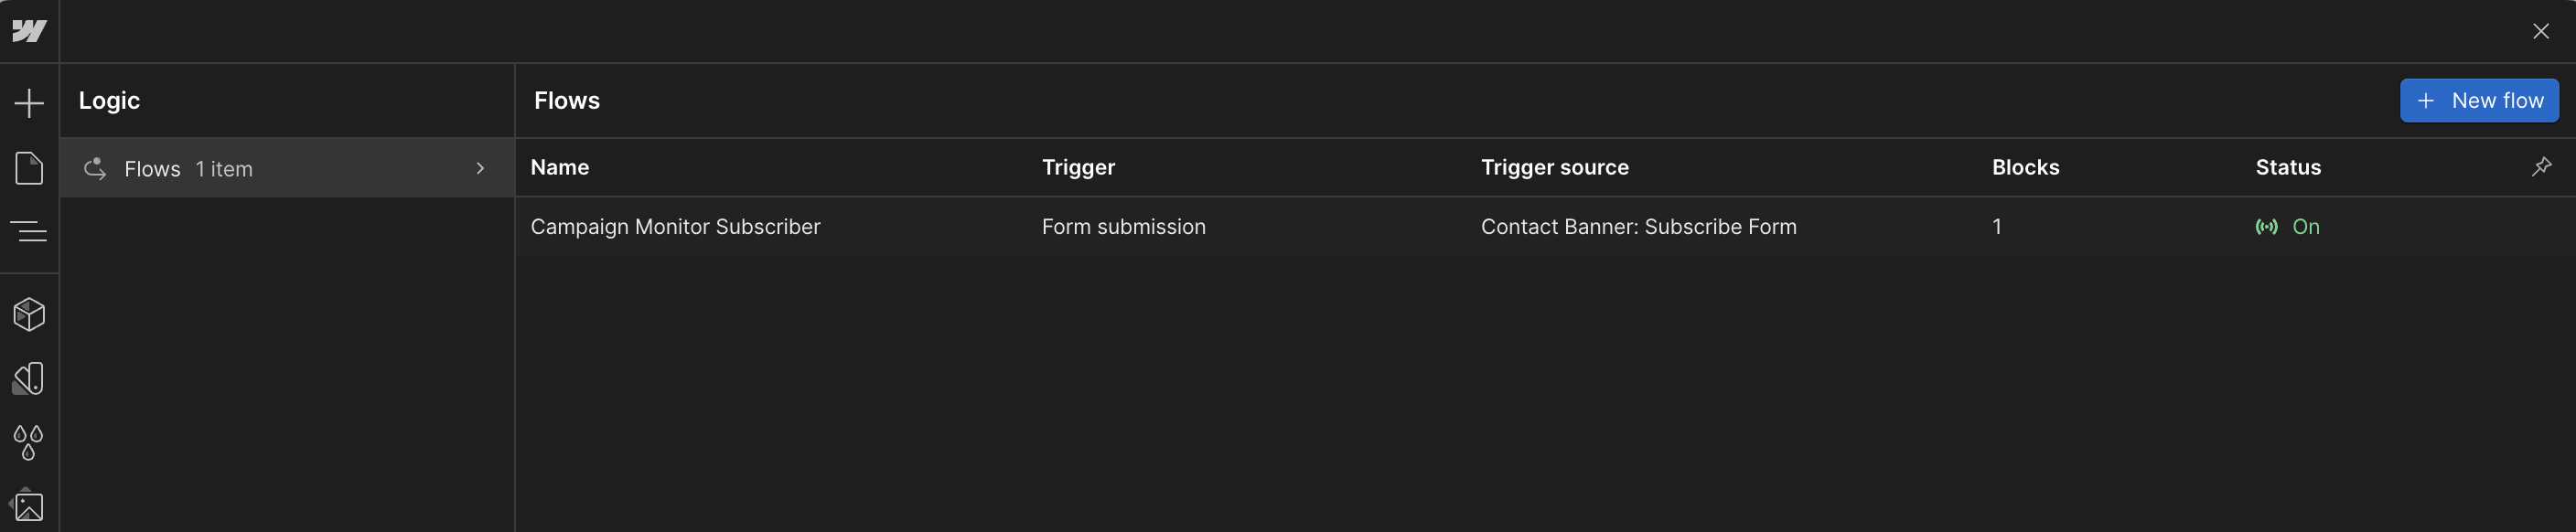
With Webflow Logic, you can automate workflows directly within Webflow. Navigate to the 'Logic' tab in your Webflow project dashboard. Here, you can create new workflows that trigger based on user actions or other defined conditions on your website. Let's create a new Logic Flow.
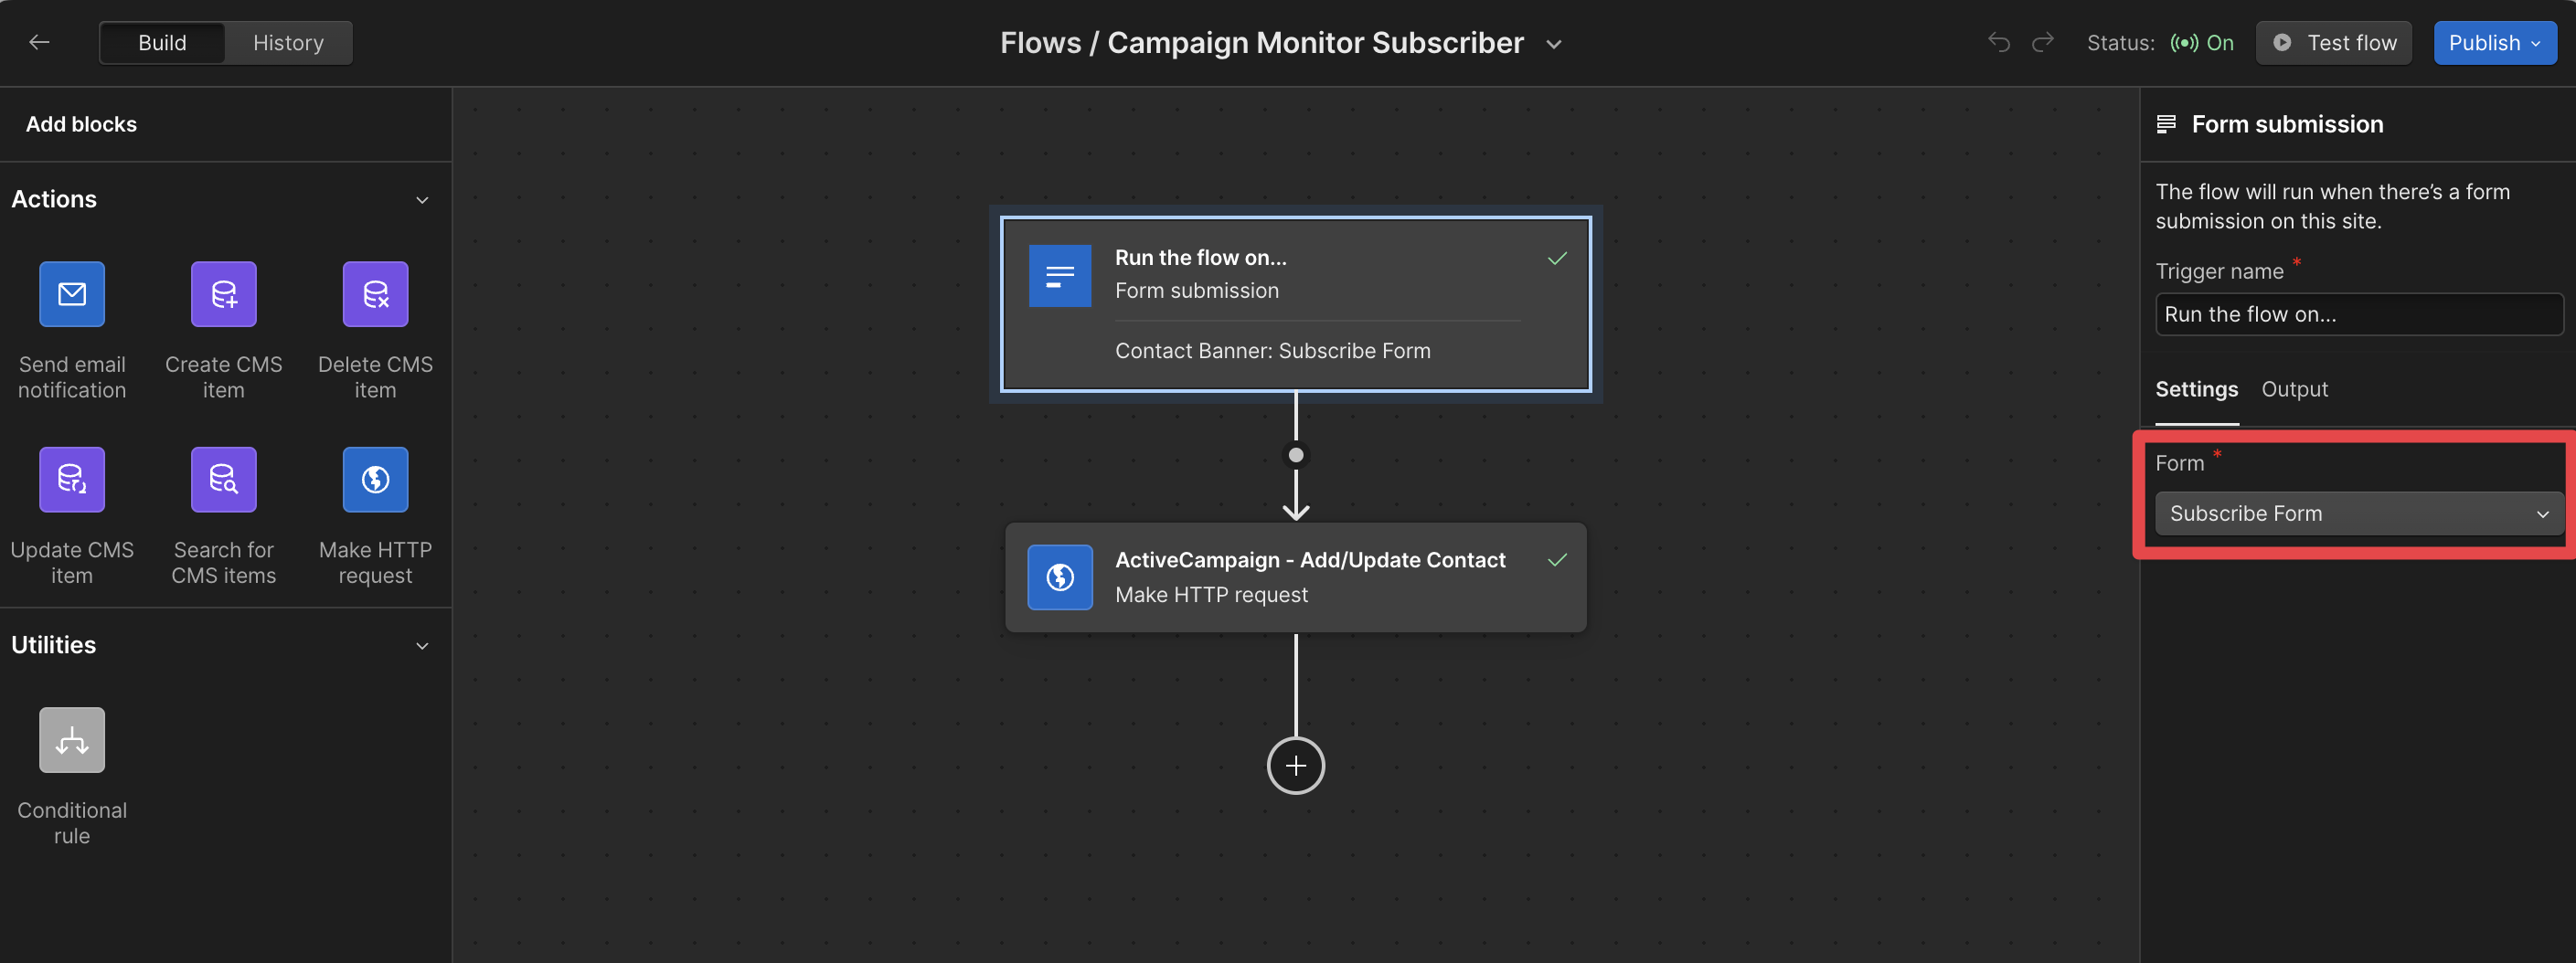
Connect your flow to your email sign-up form. In my example it's called 'Subscribe Form'.
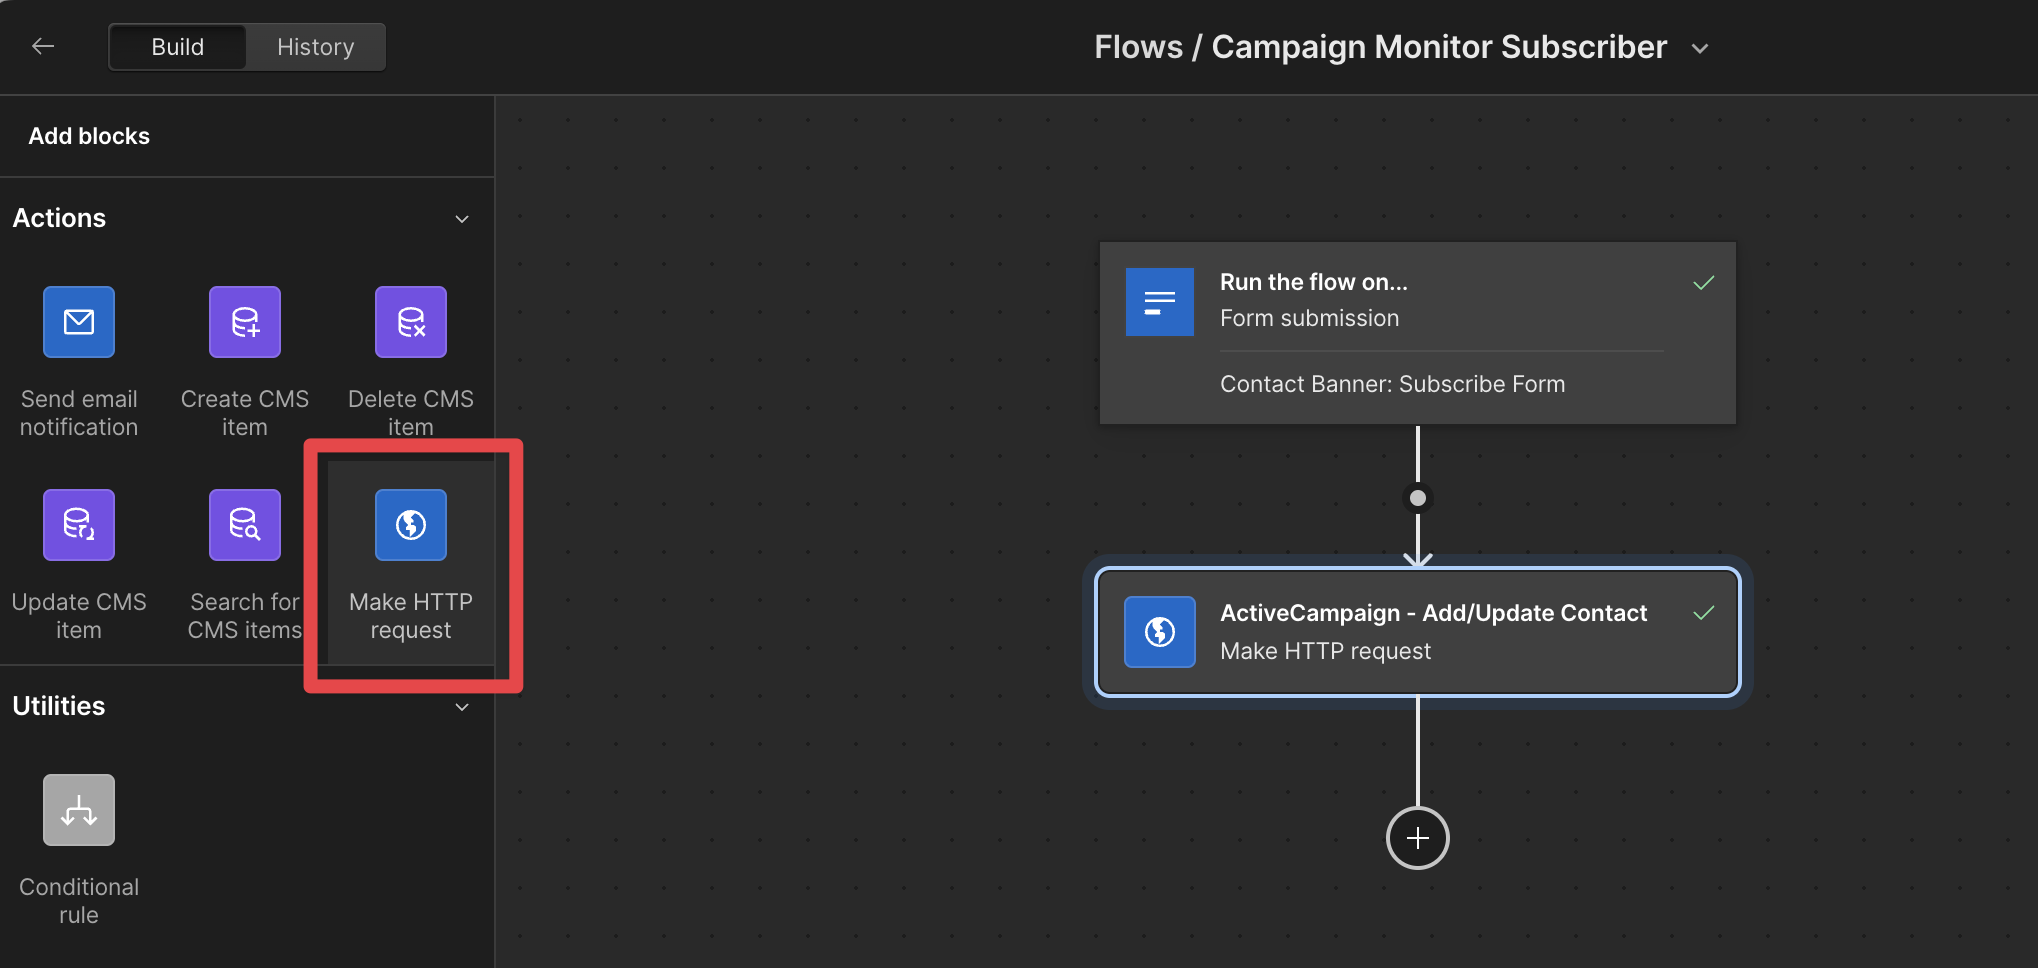
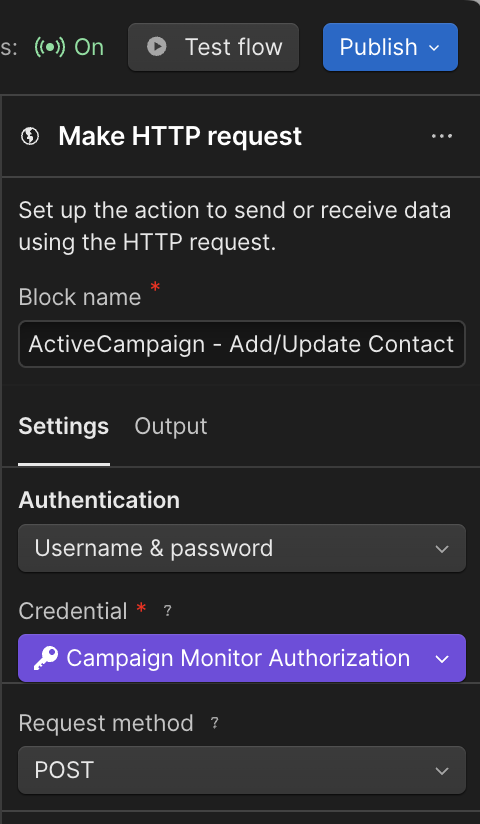
Add a 'Make HTTP request' block to the flow
Give your HTTP block a name. It doesn't really matter what, just make it clear. Make sure you authenticate using 'Username & password'. Set the Request method to 'POST'.
Under your Credentials, add a new credential.
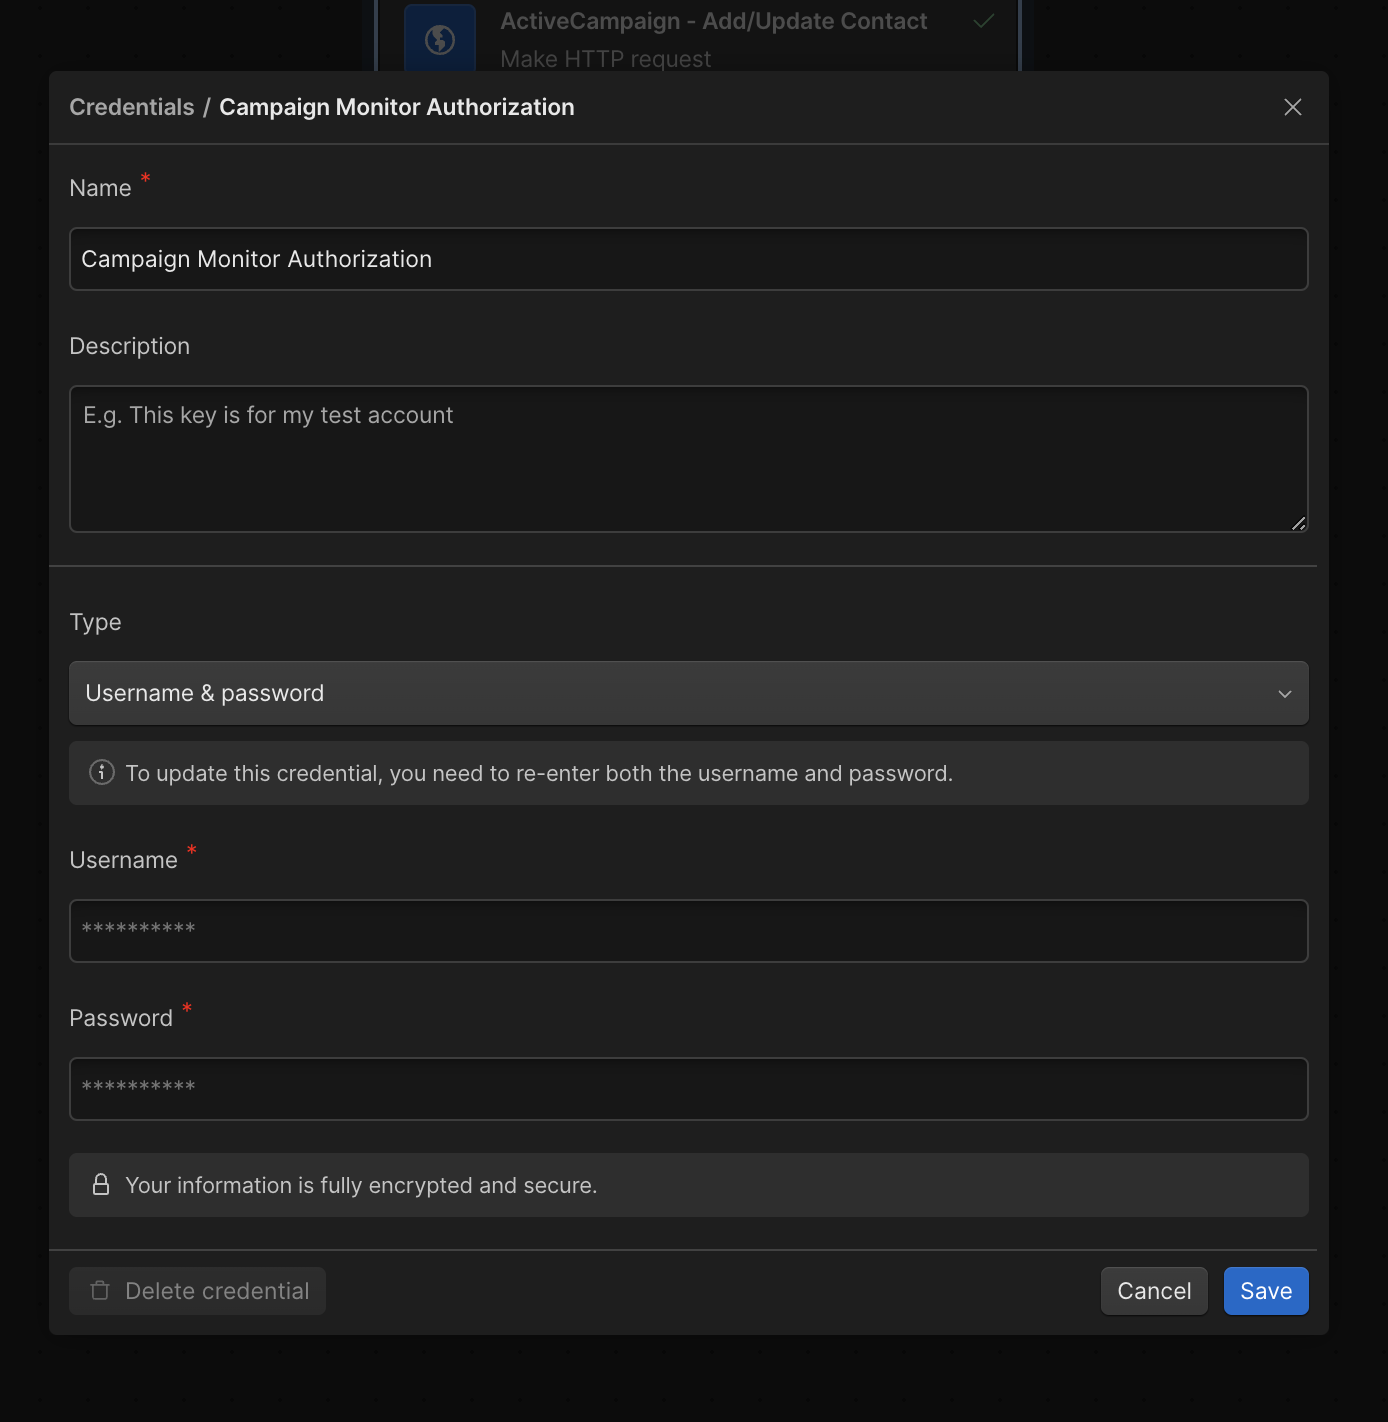
Again, give this a name and use your API key as your username. Since you can't leave your password blank, I recommend putting an 'X' in this field. Then click Save.
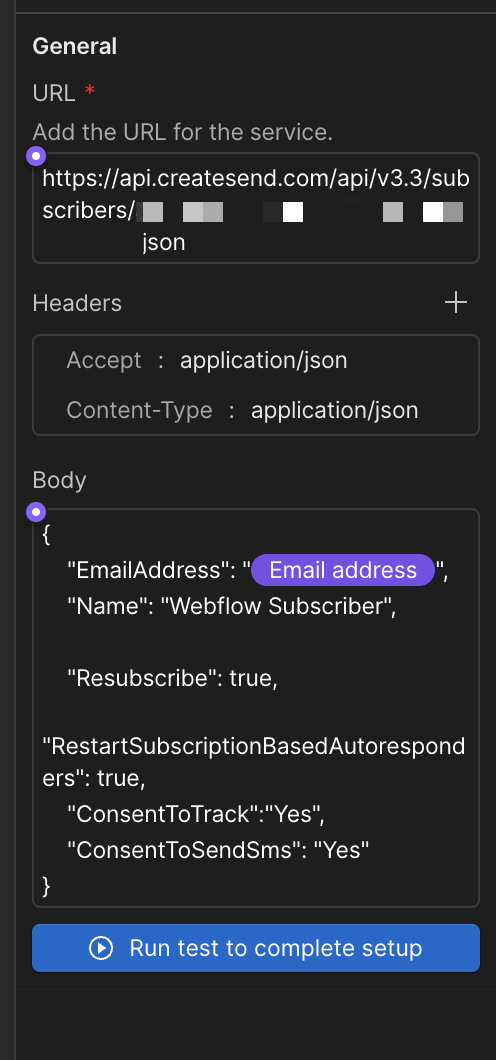
Under the URL section, you'll need to add the below URL + your List ID.json.
The URL needed;
https://api.createsend.com/api/v3.3/subscribers
So when you add your List ID to the end, you should have something that looks like the below.
https://api.createsend.com/api/v3.3/subscribers/12345abcd.json
Then we'll need to add some code to tell the API that this is a json query. Click on the + icon next to Headers and add
Accept: application/json
Content-Type : application/json
Finally, add the below code into the body. Remember, it's important to click on the Purple Dot and add in your 'Email' field that you set up in the beginning.
{
"EmailAddress": "REPLACE THIS FIELD",
"Name": "New Subscriber",
"Resubscribe": true,
"RestartSubscriptionBasedAutoresponders": true,
"ConsentToTrack":"Yes",
"ConsentToSendSms": "Yes"
}
Step 4: Testing
That should be it! After setting up the integration, test it by submitting a form on your Webflow site and checking if the data appears in your Campaign Monitor list. Use Webflow’s and Campaign Monitor’s analytics tools to monitor performance and optimise for better engagement.
Happy marketing! Let me know if this has helped you!
Have a project in mind?
VisionaryGrid is trusted by startups, businesses, and enterprises globally. Discover how we can collaborate with you to explore opportunities, address challenges, and accelerate growth.
Book a 15 minute consultation call